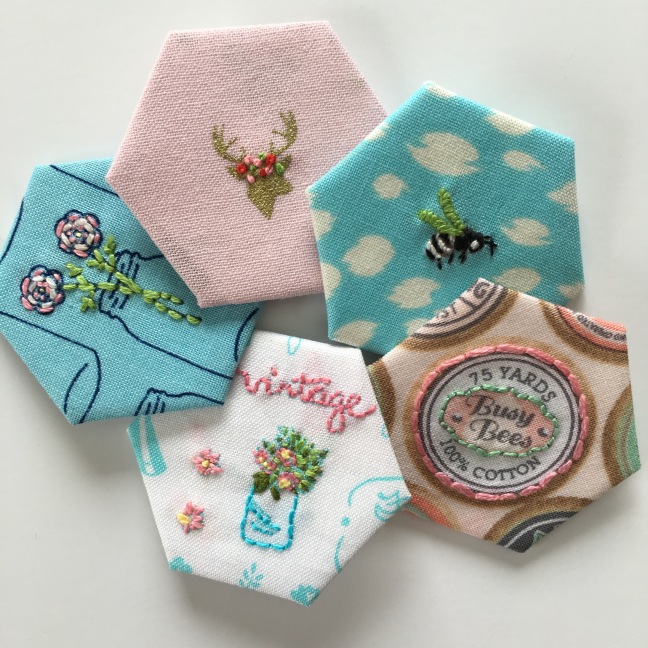
Hello and thank you for stopping by! Today I’m sharing my method on making 1″ hexies embellished with embroidery. I hunted and pecked my way around it until I found a method that worked for me, so I hope to share any tips you might not know yourself!
Here’s what you’ll need to get started:
- Fabric (I used quilting cotton) with small scale prints that you like
- Scissors
- Embroidery thread and 50w thread for basting and needles for each
- cardstock hexagons
- 1″ hexagon template (the one I used in the photo I found at my local quilt shop)
- iron
- Lightweight fusible interfacing
- Heat disappearing marker. (I use Pilot Frixion)
- small embroidery hoop (4″ is what I use)

1. Place embroidery hoop around the portion of the fabric you’d like to embroider. I usually do not cut the fabric until afterwards, and I work towards the outside edge of the fabric, so as not to waste.
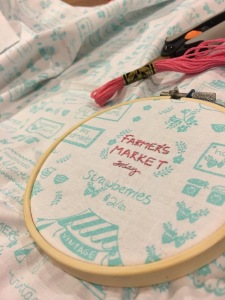
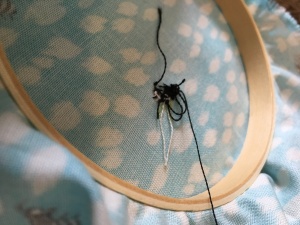
There are several fabrics that I would consider printed and primed for embroidery. Use your clear hexagon template to see what is the right scale. Then go ahead and embroider whatever you’d like. A note about technique: I use knots to start and finish, but that would not be the case for “regular” embroidery. There is simply not enough from to start and finish. Also, we will be using the fusible interfacing to kind of seal the back. As you can see, the back of my embroidery work is quite the mess!
After you are satisfied with the embroidery, prepare the fusible interfacing.
Using the hexagon template, trace around the shape on the fusible interfacing (I “accordion” the interfacing up so I can cut several at once. These don’t have to be perfect!). Trim just inside the traced line. You can see I’m about 1/8″ inside the template. This helps to not have so much bulk when you are turning in the edges for basting.


Now iron on the interfacing to the back of your embroidery work, making sure your interfacing hexagon is placed correctly. I use the traced lines on the fabric as a guide, since you can see them fairly well through the fabric if you are using a dark erasable marker.


Flip over and use your hexagon template again to trace around the design on the front, and trim from the traced lines at least 1/2″. Give yourself plenty of room. You can always trim some more away, but adding is impossible and you’ve already done all that beautiful embroidery work!


Now you are ready for the final couple of steps. Are you excited? Use your cardstock hexagons and fold over the edges and baste in place using your 50w thread.
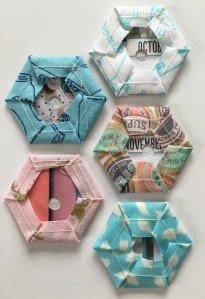
Use your iron once last time to get rid of the heat disappearing ink line. Not too much…just enough to get rid of the line. You don’t want your card stock to warp. Please not there is a whole punched in the middle of the cards. This facilitates removal of the paper after they are all sewn in. A chopstick or something similar would work. (And notice I didn’t give myself enough allowance on the deer head so I stitched a few more on that one)
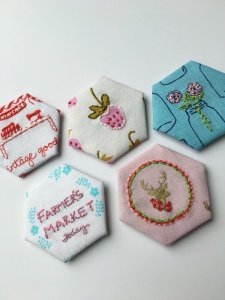
All done! They are secure, ready to use, and best of all CUTE!


Very nice! Would you mind if I forwarded this to my friend so that she could post this on her blog? Sewcanshe.com
>
LikeLike
Sure!!! Thank you.
LikeLike
What a brilliant idea. Thank you for the tutorial. I’m definitely going to give this a try.
LikeLike
I’m so glad you’ll try it! Once you start, I think you’ll begin to see possibilities in many different fabrics. Have fun!
LikeLike
These are really cute! Thanks for the ideas…your projects are lovely xx
LikeLike
You are so welcome! Thank you for visiting and commenting.
LikeLike
Where do you find such small patterns to embroider?
LikeLike
Hi Judy. I use printed fabrics that aren’t necessarily designed for embroidery. I just use the prints as their own pattern, or I don’t use a pattern, as is the case with the tiny deer. I just used a bunch of French knots.
LikeLike